DIY nightstand from IKEA dresser!
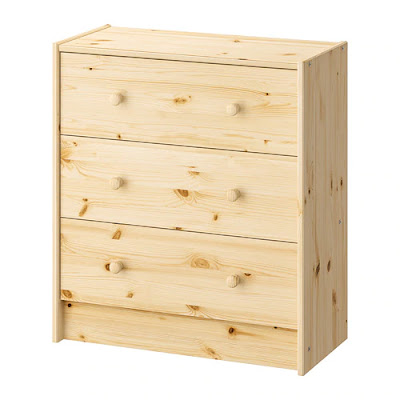
Have you seen these IKEA Rast dressers? I bought two of them when they were on sale for $27, and followed a tutorial on how to make them into this nightstand.
First, you will need to get your dresser. You can find them here.
IKEA RAST dresser
Once you have your dresser, you will need to get the trim pieces.
I bought my trim pieces from Lowes, but you can find them at Home Depot too. I bough six trim pieces per dresser. So 12 trim pieces for both dressers.
Buy your top piece. For the top, you'll need to get a 1x16 inch board and have it cut down to 12 3/4''. You can ask the people at Lowes to cut it for you if you don't have a saw to cut it yourself. Once you have your trim, and your top (cut to 1x12 3/4 x 26 5/8''), it will be time to cut your trim to size.
You will want to cut your trim pieces as follows:
For each drawer, cut two 20 inch pieces and two 7 7/16 inch pieces.
Once you have them all cut, secure them with wood glue and clamp down. You can add brad nails if you'd like, but I just used the glue, and they are holding up great.
Once you have finished gluing all trim down, you can fill the existing drawer pull holes with some wood putty. Fill your holes, let the putty dry and sand it down smooth. then you are ready to paint!
Prime and painted!
Close up. I love how it looks!
As the paint was drying, I went and worked on the top. I bough MinWax stain in Dark Walnut and used an old rag to apply the stain. I applied it in the same direction as the grain.
This stain had a strong smell, so I would use it outside or in the garage.
Here is my 1 x 12 3/4 x 26 5/8 top piece.
After the stain had dried, I applied a white wash over it. To white wash, you mix water with white paint and paint the mixture onto the top of your board. Then I immediately took a rag and wiped the paint mixture off. Depending on the look will depend on the water to paint ratio.
You can find different tutorials on pinterest on how to white wash.
Here is what mine looked like after the white wash. I was going for a weathered look an am happy with how this came out!
If you aren't going to white wash, you may want to pre-stain your wood, with a wood conditioner. This will prevent the wood from taking the stain unevenly. But since I was going to add the white wash to the top, I wasn't worried about how uneven the stain was going to come out.
I attached the top with some wood glue and finish nails, then attached my new pulls.
I got my pulls from Hobby Lobby when they were having a 50% off sale. they ended up being $2.50 each. They always have sales, so don't buy them full price. You can find my pulls here, but they have so many different ones you can pick from.
This is a super simple DIY, that anyone can tackle! It was my first time using a miter saw, and if I can do it, so can you!
All done! I love it so much and especially since it was so cheap to make!
Look at that before and after! Pin this to make it later!


Comments
Post a Comment