Posts

Showing posts from February, 2019

Affordable and large neutral rug!

Image
Are you looking for an affordable neutral rug? Look no further.. We had been on the hunt for a rug that matched our room and didn't break the bank. It's so hard to buy online, since I like to look and feel the rug, but this one had great reviews, the colors we wanted and all at a price that was affordable.  Shipping was quick and it was packaged so well. As soon as I got it inside, I unpackaged it and rolled it out. It took very little time for the wrinkles to flatten out, and I am so happy with how it looks! We bought the  Hillsby Gray Area Rug in the  7'10" x 10'3" It was on sale for $162. What a great deal! The colors are so good, if you are looking for a cream/gray carpet. It is surprisingly soft under the feet for the price.  Also loving the distressed look that it has.  At first we were looking for a rug that had some blues in it, but we decided to go with something a bit more neutral, so that we can mix up our...
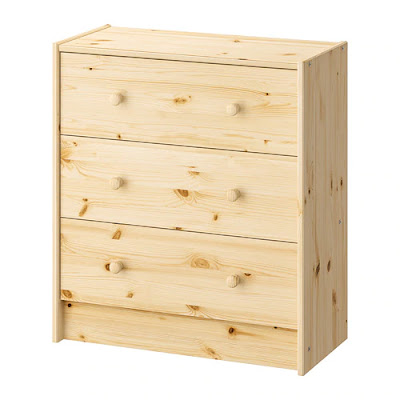
DIY nightstand from IKEA dresser!

Image
Have you seen these IKEA Rast dressers? I bought two of them when they were on sale for $27, and followed a tutorial on how to make them into this nightstand.  First, you will need to get your dresser. You can find them here .  IKEA RAST dresser Once you have your dresser, you will need to get the trim pieces.  I bought my trim pieces from Lowes, but you can find them at Home Depot too. I bough six trim pieces per dresser. So 12 trim pieces for both dressers.  Buy your top piece. For the top, you'll need to get a 1x16 inch board and have it cut down to 12 3/4''. You can ask the people at Lowes to cut it for you if you don't have a saw to cut it yourself. Once you have your trim, and your top (cut to 1x12 3/4 x 26 5/8''), it will be time to cut your trim to size.  You will want to cut your trim pieces as follows:  For each drawer, cut two 20 inch pieces and two 7 7/16 inch pieces.  Once you have them all cut, secur...

DIY $100 kitchen makeover

Image
I've wanted to have our cabinets painted white for so long now, and with some push from my sister, I finally tackled the project. I heard form a lot of people that it was going to be a huge and difficult project. It took me three days to do this section and it wasn't all that bad. Here is what I did to update our kitchen on a budget.  This is what I started with. These outdated cabinets.  My first step was to clean them. I used TSP and gave them a good cleaning; boxes drawers and doors.  You'll need gloves and a rag. Just follow the directions on the box.  After cleaning them really well, I took the doors off the boxes and sanded them down. i was able to scratch them up and get the shine off. Then came the fun part - priming! This is where I actually saw some progress. I used Kilz primer, and painted one coat on with a good paint brush. I let it dry and added a second coat of primer.  Once the cabinets were all primed, I started painting...