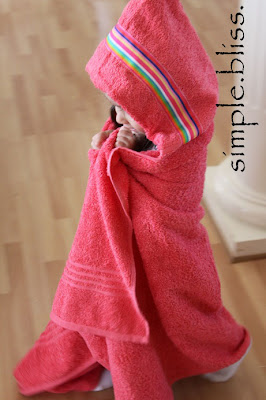
I just love the baby hooded towels, but my little one has grown out of them. I have been using regular towels on her, and I miss the hood. I came across this tutorial on how to make large sized hooded towels, but can't seem to find the tutorial anymore. I tried to recall as best I could, and tried to make a couple, here is what I came up with... This hooded towel is so easy to make and I LOVE how big they are! You can make any color you want, and add any color ribbon or fabric strips to the hood! Here is how I made this: First you will need a regular sized towel and a hand towel. You can also get matching ribbon or scrap fabric strips to add to the hood if you would like. I bough my two towels at Wal-Mart on sale for a little over $5. Take your hand towel, and cut it around 24 inches long. Fold your hand towel in half lengthwise, and cut your ribbon to the same size as the towel. Pin your ribbon to the towel, about 1 inch from the fold. Now o...
Here is a maxi skirt I made and wore for Thanksgiving. It is so easy and inexpensive to make! Material: Fabric: You will need to pick out the fabric material and color you want. I used a stretch knit from Joann's Fabric. (Don't forget to use your coupons when buying your fabric!) Elastic band First, you will need to measure how much fabric you will need. I measured from where I wanted the skirt to start, down to the floor, for the length. For my skirt, I got 45'' in length (keep in mind the type if shoes you will be wearing with your skirt. For flats, it will need to be shorter, for heels, measure longer.) The great thing about this material is that I did not need to finish any edges! It will not fray and looks fine unfinished. Woo hoo! :) Next, you will need to measure your waist for the elastic length. Keep in mind that your length will need to be about an inch shorter than your waist measurement. The elastic will stretch and fit your waist snug. If ...
I had been searching for a coffee table for some time, and couldn’t find one that fit our space that was within our budget. So instead of getting anything, I decided to make a temporary table. I wanted something simple and low profile. What started as a temporary table has now become our permanent coffee table and it fits our space well. This table doesn’t require much, and is customizable in whatever length and color you want. Here are the simple steps I took to make this table: My first step was buying the supplies. I bought two 2x10x8 pieces of pine wood, which cost me $40. Then I measured out the length I needed and cut the pieces to size. I used my miter saw and had to make two cuts, because my blade wouldn’t cut all the way through in one pass. This is what one cut with my miter saw cut. So I flipped the board, lined the cut up with the blade and cut another pass to fully complete the cut. Once I had them to the size I needed, I ran the inside edges through...


Good job mom! And those purple sneakers are adorable.
ReplyDeleteThank you Shari!
ReplyDelete