Lollipop Birthday

My daughter's second birthday is in about two weeks, and I am just beginning to plan. I am in charge of all the decorations and details, and I have so much to do! This next week or two will be all about making decorations for a lollipop birthday party. Although you could use the same concept and make it for any theme that you would like.
So this is my attempt at creating a lollipop birthday party on a budget!
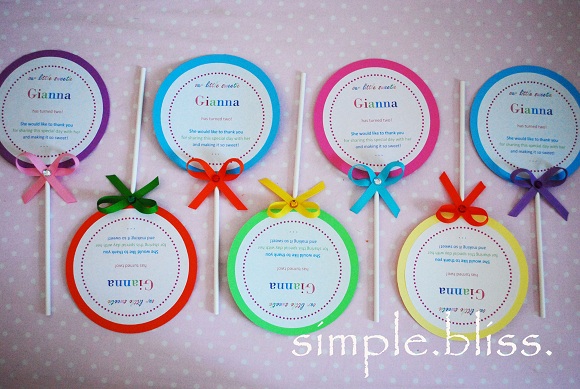
The favors I will be making are paper lollipops. I will also attach a clear bag of jelly beans to each lollipop.

First, you will need to get your material together. For this project, you will need:
- cookie sticks (Michael's Craft)
- scrapbook paper/ construction paper
- differnt colored ribbon
- Gems - optional (any craft store)
- hot glue gun

Your fist step is to create your image. I used Microsoft Word to create mine. It was pretty easy to do! You can make yours say whatever you would like. You can also change the wording to make these into birthday party invitations.
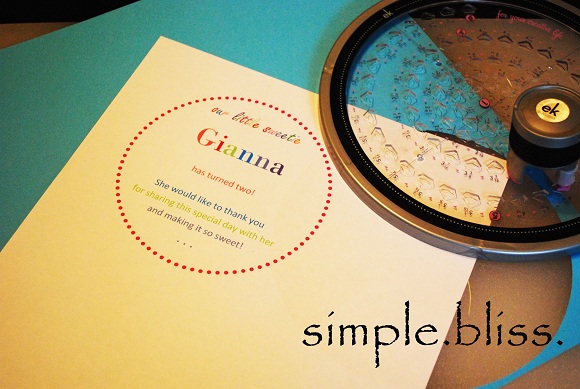
Once you have your image created, print out as many copies as you need. You will need to cut the image out, as well as the colored backing. I cut my colored paper larger than my image so that there was a colored border when I glued them together. I used a circle cutter to make my perfect circles. You can always trace a circle on the paper and cut it that way.

Glue the back of your image and place it in the center of your colored paper.

Take your cookie stick and tape it to the back of your paper.

Now to make the bow. These are made in a few easy steps. You will need to warm up your glue gun for this. Once your glue gun is ready, take a piece of ribbon, seal the ends. I used a lighter to seal mine, but you can use fray check, clear nail polish, or any other form you want.
- create a ribbon with your piece, adding a dot of glue where the ribbon meets
- Flip bow over and add a dot of glue where my finger is.
- Fold the top of the ribbon down onto the glue and press for a few seconds.
- Turn bow over (to the right side) and add your gem.

Add some glue to the back of your bow and attach to to the stick.

And that is it! Super easy! Make as many as your would like, with as many colors...


---------------
Check out our new post!
Potterybarn dupe couches for half the price.


How creative! Love the idea.
ReplyDeleteHi! Stopping by from MBC. Great blog.
Happy New Year!
Hi! New follower from MBC. Awesome blog. Please follow back. http://thisSAHMsworld.blogspot.com
ReplyDeletehello there, dropping by from MBC! and i simply love these, would love to make one for my son's second birthday:)
ReplyDeleteI love this creative and budget-friendly idea for birthday party favors.
ReplyDelete